
It can be a bit of a challenge to work out just how to get started with one of these for the first time. Here we will look at what you need to actually get up and running, and the steps I took with my first Pi zero to get it booted up and connected to to internet in order to use it in our first robot. You need a few additional items to get one of these boards up and running.
First, the computer needs some sort of data storage to read and write files from, and to hold the operating system (OS). These boards use a micro SD card for this purpose. You need at least 8GB of space to install the Raspbian OS. If you need more space to hold lots of files (maybe video files recorded on a Pi camera?) then you might decide to use a larger card.
In order to power the computer, you need some sort of power supply. The Pi Zero will run off the USB chargers which come with most tablets (chargers which can output 2A). Smaller phone chargers may not be able to provide enough power for the board to run reliably. If you don't already have a suitable charger then you can buy a power supply specifically for the Raspberry Pi, or if you are looking to built a robot which is not connected by wires at all then a USB charger battery can be used.
You will need to be able to see the computer output on a screen. To get started, this is most easily done using an HDMI cable to connect it to a TV or computer monitor which has an HDMI input. But you also need an adaptor to connect the HDMI cable to the mini HDMI port on the Pi Zero. Later this can be replaced with a remote computer connecting over a wireless network, but we need to set that up first, so a screen connected directly to the Pi using a cable is needed initially.
You need a keyboard to send commands to the Pi too. This should be a USB keyboard, but you also need another adaptor to enable you to plug the USB keyboard into the micro USB port on the Pi Zero board. If you are using the graphical desktop in the full Raspbian OS then you'll also need a USB mouse. The Pi Zero only has one USB port, so you will need a USB hub of some sort to plug in both the keyboard and the mouse. In my case I had a USB keyboard which had a built-in hub, so I could plug the keyboard into the Pi (via an adaptor cable) and plug the mouse into the USB port on the keyboard.
Finally, in order to connect to your Pi over a wireless network, you will need a USB WiFi dongle. You don't need to plug this in just yet though.
Optional, but recommended is a case for the Pi. Otherwise you have to be careful with a powered on bare circuit board as any contact with metal objects could cause a short circuit and damage it. You can see my assembled set up below (apart from the screen which the other end of the HDMI cable would plug into).
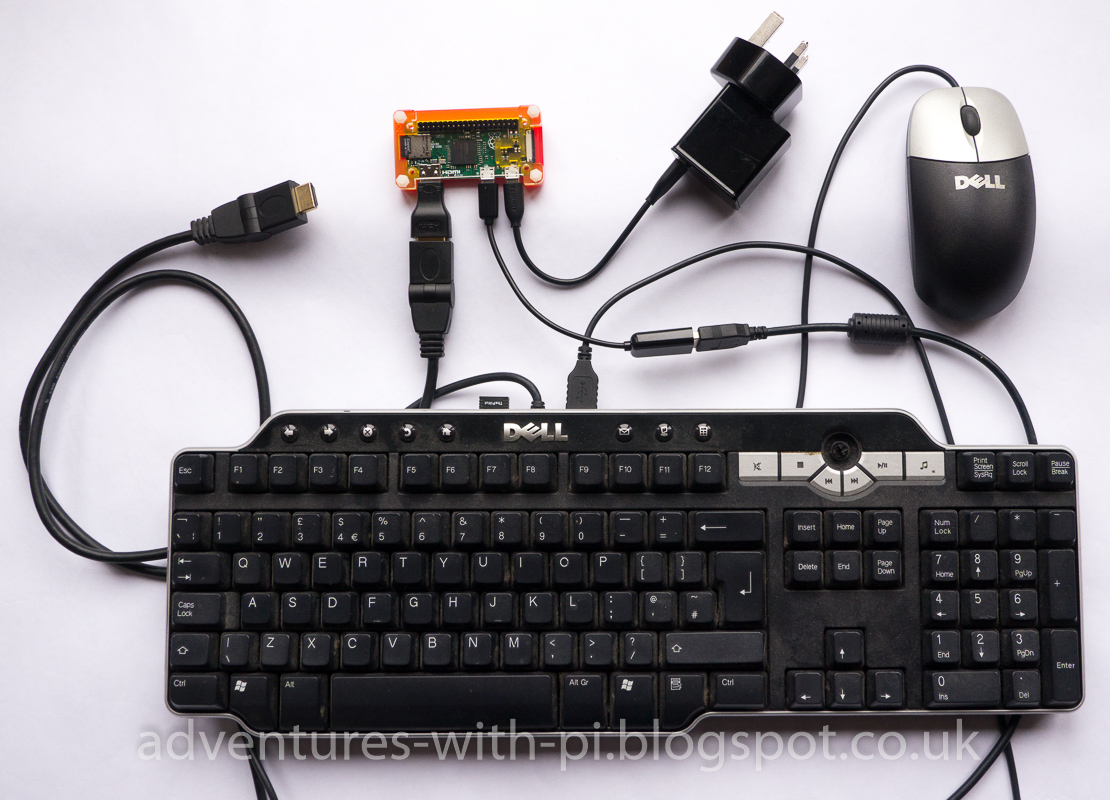
Before you can boot up the Pi Zero you will need to install an OS on the SD card. For our robot we used Raspbian Jessie Lite. You can buy micro SD cards with NOOBS pre-installed if you want to be guided through the OS set up. Or you can save a small amount of money by purchasing a cheap micro SD card (I would recommend getting at least a class 10 card or reading and writing from it will be a little slow). Next download a Raspbian image from the Raspbian website and write the image to the SD card on a computer using an imaging program (I used Win32 Disk Imager on a Windows 10 laptop to do this). Once you have an OS image written to the SD card you can connect everything up and power on the Pi Zero for the first time.
Note that the WiFi dongle is not connected yet. I tried plugging mine into the spare USB port on my keyboard, but the port did not supply enough power and the dongle was not visible to the Pi. However, once we have got the Pi zero booted up and configured to connect to our Wireless network we can shut it down, unplug the keyboard and plug in the USB dongle instead. Then when we boot it up and it has connected to the network, we can connect to it from a laptop to control it. From this point in time we no longer need a keyboard (or a screen) connected to the Pi. See the link at the end of this article for how to configure the Pi Zero to connect to your WiFi network.
If you plan to connect any add-on boards or other electronics to the Pi, then you will also need to solder a 40 pin header onto the Pi Zero board. The full size Raspberry Pi boards come with these already attached.
Below you can see all these essential components laid out with the bare Pi Zero board. In this case a small adaptor shim is shown instead of the micro USB to full size USB adaptor cable. It does the same job as the cable but is much smaller. Most importantly, it must be inserted into the larger USB plug the right way up or you will short circuit the power on your Pi Zero board!

Most of these items can be purchased along with the Pi Zero as an 'essentials' kit from the Pi suppliers. If you are not sure where to buy all the things you might need for your Pi adventures, then take a look at the links page where I maintain links to the websites for anything I have found useful for my adventures with the Pi.
Once everything is up and running, the bare bones Pi Zero only needs the USB wireless dongle and a power supply connected. If something goes wrong with the configuration then having a screen connected is a great help though. Here is my Pi Zero with the header soldered on, the SD card inserted and the whole thing protected with a Pibow Zero case from Pimoroni. The USB WiFi dongle is connected using a shim adaptor. The HDMI adaptor is still connected in case I need to connect a screen, but once it is all working that could also be removed.

In the next article we will walk through how to configure Raspbian to get the Pi Zero connected to the internet over the wireless network, and connect to it remotely from a laptop.
No comments:
Post a Comment